How to Identify Minerals in 10 Steps (Photos)
Identifying minerals is a fundamental skill for geologists, gemologists, and rock enthusiasts. The ability to distinguish one mineral from another is essential for understanding the Earth's composition and unlocking the secrets of its history. In this comprehensive guide, we'll walk you through the 10 steps to confidently identify minerals and unlock the captivating world beneath the surface.
Mineral Identification Steps
Step 1: Pick Your Mineral
 |
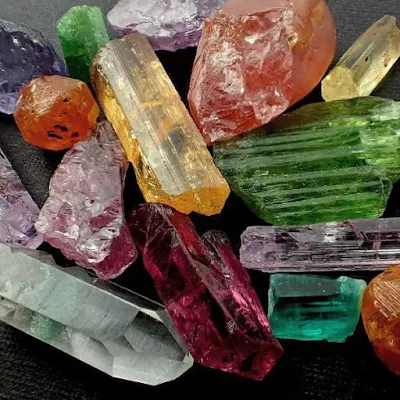
| Mineral samples. Photo: Crystalarium |
Learning mineral identification is like learning to cook. You begin by following step-by-step procedures and looking up a lot of things. But after a while you notice regularities, become familiar with the usual suspects, make some productive mistakes, and get better at it until it becomes easy and fun.
Another way mineral identification is like cooking is that professionals can go to school, learn to use expensive equipment and master the subject fully, yet amateurs can handle nearly all the common possibilities using just a few simple tools.The first thing to do is to observe and test your mineral. Use the largest piece you can find, and if you have several pieces, make sure sure that they are all the same mineral. Examine your mineral for all of the following properties, writing down the answers. After that you'll be ready to take your information to the right place.
Step 2: Hardness
 |
| Kit of Mohs' Hardness Mineral Identification |
Hardness is a mineral's ability to resist being scratched. Minerals that are not easily scratched are hard. You test the hardness of a mineral by scratching its surface with a mineral of a known hardness. Mineralogists use Mohs Scale as a reference for mineral hardness. The scale lists common minerals in order of their relative hardness. You can use the minerals in the scale to test the hardness of an unknown mineral.
As you can see, diamond is a 10 on Mohs Scale. Diamond is the hardest mineral, which means that no other mineral can scratch a diamond. Quartz is a 7, so it can be scratched by topaz, corundum, and diamond. Quartz will scratch minerals, such as fluorite, that have a lower number on the scale. Suppose you tested a piece of pure gold for hardness. Calcite would scratch the gold, but gypsum would not because gypsum is a 2 and calcite is a 3. That would mean gold is between the hardness of gypsum and calcite, or 2.5 on the scale. A hardness of 2.5 means that gold is a relatively soft mineral. It is only about as hard as your fingernail.
Read about Mineral hardness.Step 3: Luster
Luster describes the way light reflects off of the surface of the mineral. You might describe diamonds as sparkly or pyrite as shiny, but mineralogists have special terms to describe the luster of a mineral. They first divide minerals into metallic and non-metallic luster. Minerals like pyrite that are opaque and shiny have a metallic luster. Minerals with a non-metallic luster do not look like metals. There are many types of non-metallic luster, six of which are described in Table:
Step 4: Color
 |
| Photo by: structure_minerals |
Color is probably the easiest property to observe. Unfortunately, you can rarely identify a mineral only by its color. One of the most important physical properties of minerals, reflecting the nature of the interaction of the electromagnetic radiation of the visible region with the electrons of the atoms, molecules, and ions of the crystals and with the electron system of the crystal as a whole. In mineralogy, color is one of the primary diagnostic properties of natural compounds, of great importance in geological prospecting for the identification of minerals.
The color of gems and semiprecious stones is one of their main qualitative (gem) characteristics. A distinction is made between the color of minerals in individual crystals and lumps of ore, the color of minerals in transparent thin sections (under the microscope), the color of minerals in polished sections (in reflected light), and the color of a mineral’s streak (the color of the fine powder of the mineral).
Three main groups of minerals are identified on the basis of the property of color: idiochromatic, allochromatic, and pseudochro-matic.
Idiochromatic minerals are "self colored" due to their composition. The color is a constant and predictable component of the mineral. Examples are blue Azurite, red Cinnabar, and green Malachite.
Allochromatic minerals are "other colored" due to trace impurities in their composition or defects in their structure. In this case, the color is a variable and unpredictable property of the mineral. Examples are the blue in Amazonite (orthoclase), yellow in Heliodor (spodumene) and the rose in rose quartz.
Pseudochromatic minerals are "false colored" due to tricks in light diffraction. In these cases, color is variable but a unique property of the mineral. Examples are the colors produced by precious opal and the shiller reflections of labradorite.
Step 5: Streak
Streak is the color of the powder of a mineral. To do a streak test, you scrape the mineral across an unglazed porcelain plate. The plate is harder than many minerals, causing the minerals to leave a streak of powder on the plate. The color of the streak often differs from the color of the larger mineral sample. If you did a streak test on the yellow-gold pyrite, you would see a blackish streak. This blackish streak tells you that the mineral is not gold because gold has a gold-colored streak.
Streak is a more reliable property than the color of the mineral sample. The color of a mineral may vary, but its streak does not vary. Also, different minerals may be the same color, but they may have a different color streak. For example, samples of hematite and galena can both be dark gray, but hematite has a red streak and galena has a gray streak.
Step 6: Crystal Form and Mineral Habit
The term crystal habit describes the favored growth pattern of the crystals of a mineral species, whether individually or in aggregate. It may bear little relation to the form of a single, perfect crystal of the same mineral, which would be classified according to crystal system.
Subtle evidence of the crystal system to which a mineral species belongs is, however, frequently observed in the habit of the crystals which a specimen displays.
The terminology used to describe crystal habit is not intended to replace the precise nomenclature of crystallography. Instead, it is intended as a supplement to this system. Discussions of crystal habit are more descriptive than precise; for this reason the terminology is suited to the discussion of mineral samples discovered in the field. Naturally formed specimens are rarely quantitatively perfect.
Step 7: Cleavage and Fracture
 |
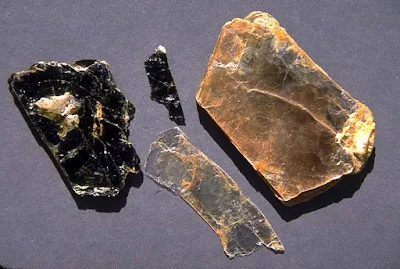
| Biotite and Muscovite cleavage |
Cleavage is the way a mineral breaks. Many minerals break along flat planes, or cleavages—some in only one direction (like mica), others in two directions (like feldspar), and some in three directions (like calcite) or more (like fluorite). Some minerals, like quartz, have no cleavage. Cleavage is a profound property that results from a mineral's molecular structure, and cleavage is present even when the mineral doesn't form good crystals. Cleavage can also be described as perfect, good or poor.
Fracture is breakage that is not flat. The two main kinds of fracture are conchoidal (shell-shaped, as in quartz) and uneven. Metallic minerals may have a hackly (jagged) fracture. A mineral may have good cleavage in one or two directions but fracture in another direction.
To determine Cleavage and fracture, you'll need a rock hammer and a safe place to use it on minerals. A magnifier is also handy, but not required. Carefully break the mineral and observe the shapes and angles of the pieces. It may break in sheets (one cleavage), splinters or prisms (two cleavages), cubes or rhombs (three cleavages) or something else.
Step 8: Magnetism
Magnetism is a distinctive property in a few minerals. Magnetite is the prime example, but a few other minerals may be weakly attracted by a magnet, notably chromite (a black oxide) and pyrrhotite (a bronze sulfide). Use a strong magnet. The magnets I use came from the corners of an old plastic shower curtain. Another way to test magnetism is to see if the specimen attracts a compass needle.
Step 9: Other Mineral Properties
Taste is definitive for halite ( rock salt ), of course, but a few other evaporite minerals also have distinctive tastes. Just touch your tongue to a fresh face of the mineral and be ready to spit—after all it's called taste, not flavor. Don't worry about taste if you don't live in an area with these minerals.
Fizz means the effervescent reaction of certain carbonate minerals to the acid test. For this test, vinegar will do.
Heft is how heavy a mineral feels in the hand, an informal sense of density. Most minerals are about three times as dense as water, that is, they have a specific gravity of about 3. Make note of a mineral that is noticeably light or heavy for its size. Galena, on the right, is distinctly heavy. Sulfides and oxides tend to be dense
Step 10: Look It Up
Now you are ready for mineral identification. Once you have observed and noted these mineral properties, you can take your information to a book or to an online resource. Start with my table of the rock-forming minerals, because these are the most common and the ones you should learn first.
Each mineral's name is linked to a good photograph and notes to help you confirm the identification. If your mineral has metallic luster, go to my Minerals with Metallic Luster gallery to see the most likely minerals in this group. If your mineral is not one of these, try the sources in the Mineral Identification Guides category.


%20(1).webp)


