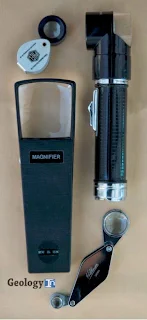
Geological Field Equipment and Safety
Before going out into the field it is necessary to:
(1) assemble all of the field equipment that you might need;Quantification of geological observations
Information on how to master the basic geological measurements.
How accurate the measurement needs to be, or whether an estimate is suffi cient, depends on the objective of the exercise and the quality of the exposure. For example, if all you need is a general description of a sandstone body it may be sufficient to describe it as a sandstone with beds of variable thickness between about 10 cm and 2 m. However, if you need to sample the sandstone or determine how the thickness of the individual units varies laterally then it will be necessary to measure the thickness of each of the units.
Equally in most cases there is a need to record the azimuth (direction relative to north) and the magnitude of the vertical angle or dip to the nearest couple of degrees rather than just the general direction. This is because of the need to convey important information on the direction of different processes (e.g. folding or palaeocurrents) and, importantly, enable an accurate record of the geometry of rock units to be calculated and recorded.
The hand lens and binoculars
 |
Photograph to show correct use of the hand lens.
Note that the person is holding the lens close to
his eye. The lens is fastened on a lanyard around
his neck for ease of access and use.
|
Not all of the rock ’ s surface will be in focus at the same time because of its unevenness. You will need to rotate the hand specimen or move your position to look at different areas. In the case of some metamorphic rocks and carbonate sedimentary deposits it is also useful to examine a weathered surface because the minerals or grains sometimes weather out and are often easier to see.
The compass - clinometer
The compass - clinometer is used to measure: (1) the orientation of geological planes and lineations with respect to north; and (2) the angle of dip of geological features with respect to the horizontal. This allows an accurate record of the geometry of the features to be constructed. The compass - clinometer can also be used in conjunction with a topographic map to accurately determine location.
The Brunton - type compass-clinometer is a more sensitive device because of the in - built spirit levels and the graduation of the scales in 1° rather than 2 ° increments. The Brunton - type can also be used for more tasks ; however, it is bulkier, more expensive and for some functions more difficult to use. The accuracy of the Silva - type compass clinometer is sufficient for most purposes and is much better designed for directly transferring compass directions to a map. Because the design of the two compass - clinometers is different, their operation for some measurements is also different.
Measuring distance and thickness
Thickness and distance are two of the most basic measurements that need to be made for many geological tasks.
A surveyor ’s 30 m tape is useful for large - scale measurements, for instance during regional mapping. Smaller, shorter and much cheaper, 2 or 5 or 10 m length, retracting metal - tape measures (Figure 2.13 , item 4) are, however, perfectly adequate for small - scale work and for graphic logging. The retracting metal - tape measures also have the advantage that they are stiff and therefore can be used much more easily to obtain an accurate measurement of the thickness of the bed by holding it perpendicular to the bedding. Folding plastic metric rulers that extend to 1 m or 2 m can be obtained in some countries and are very useful as a scale for photographs and for graphic logging.
These stiff rulers can easily be used to measure the thickness of partially submerged beds, for instance in a rock pool on the foreshore, and can be held at the bottom and pointed up cliffs to measure the thickness of otherwise inaccessible beds. They are also much easier to use when measuring on your own because the thickness of beds that are greater than that of your arm span can be measured. A pole of known length or a long steel rule or wooden rule can also be used for this purpose and for general measurements. When measuring the dimension o a geological feature it is important to ensure that you have not overestimated the distance by placing the tape oblique to the bedding plane.

.jpg)


